Abstract
This document provides a step-by-step procedure for replacing a faulty Pressure Box in your C-Trap. It includes preparation, hardware replacement, DHCP configuration, verification in Bluelake, and troubleshooting of common issues such as connectivity or unstable pressure. Instructions are also provided for the return of the defective unit and contacting customer support.
1. Required Tools and Parts
Tools: None required
Parts:
- Replacement Pressure Box
- Blue Ethernet cable (from the PB unit)
2. Preliminary Steps
2.1. Unpack the new Pressure Box and record the MAC address from the sticker on the unit.
- The MAC address is a hexadecimal code printed on one of the faces of the Pressure Box.
- If no sticker is present, proceed with Section 4.2 (alternate MAC retrieval).
2.2. On the controller PC (the PC running Bluelake):
- Log in to a Windows administrator account (usually the C-Trap owner).
- Open Bluelake.
2.3. In Bluelake:
- Vent pressure from the Pressure Box.
- Close Bluelake.
2.4. Depressurize the system using the black regulator under the left side of the C-Trap (see Fig. 1 & 2):
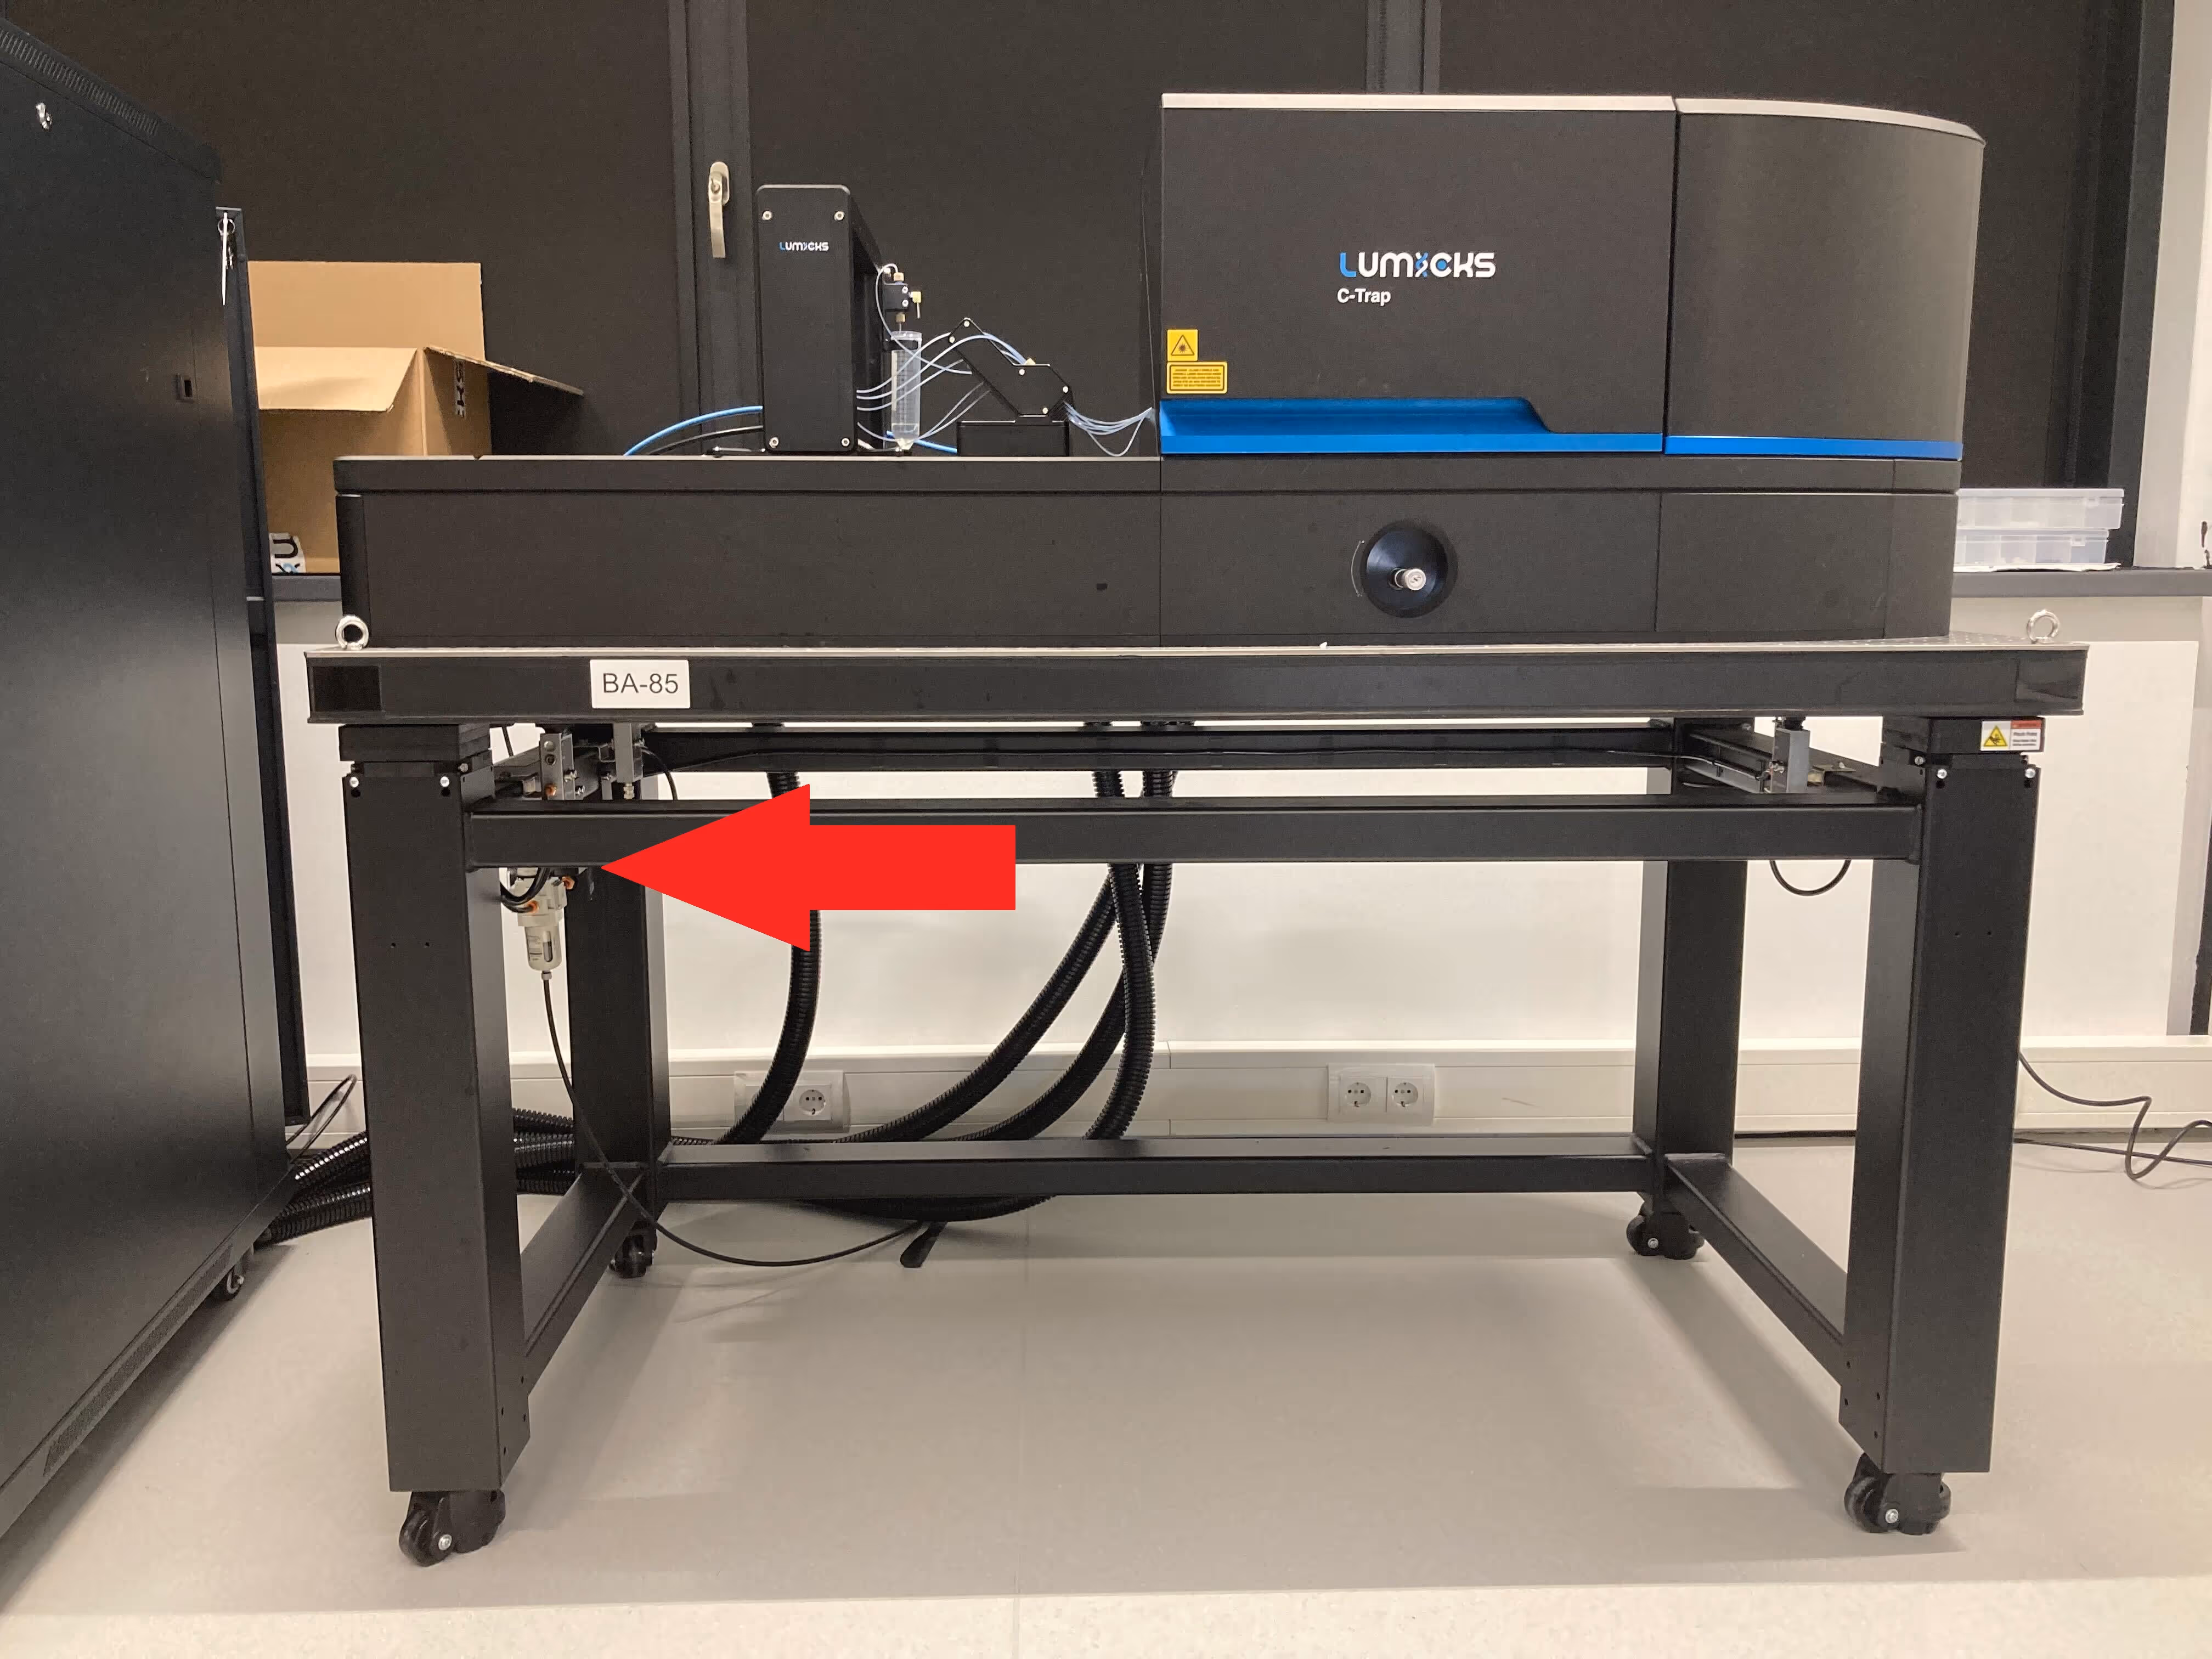
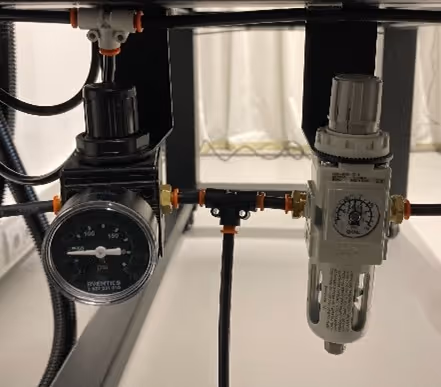
- Pull the regulator cap upward and rotate it anticlockwise until the pressure gauge shows 0 bar.
Note: For older systems, the pressure regulator may be in a different location. If needed, follow the airline from the Pressure Box to locate it.
2.5. Empty the contents of the syringes into a fluid waste container and leave them disconnected from the Pressure Box.
3. Replacing the Pressure Box
3.1. Disconnect the Ethernet cable and the black airline cable from the push-fit connector labeled pressure on the Pressure Box.
3.2. Remove the faulty Pressure Box and position the replacement unit in place.
3.3. Reconnect the Ethernet cable and airline to the new Pressure Box.
- Verify that the lights on the Ethernet connector are illuminated.
3.4. Secure the syringes to the new Pressure Box.
3.5. Repressurize the system to 2.1 bar using the black regulator:
- Rotate the cap clockwise until the gauge reads 2.0–2.1 bar.
4. Configuring the DHCP Server
4.1. Using the MAC Address from the Device Sticker
On the controller PC:
- Open the file: C:\srv\dhcp\OpenDHCPServer.ini (Right-click → Edit → Notepad).
- Scroll to the Devices section at the bottom of the file. Replace the existing MAC address entry for pressurebox with the new PB’s MAC address.
.PNG)
- Save the file (File → Save).
- Open the Windows Services app (search “Services” in the Windows Start menu).
- Locate Open DHCP Server, right-click, and select Restart.
.avif)
- Open Firefox and navigate to: http://localhost:6789.
- Confirm that under Active leases the new MAC address appears with the hostname pressurebox.
.avif)
4.2. If the MAC Address Sticker is Missing
- Open Firefox and go to: http://localhost:6789 to view the DHCP server status page.
- Note all devices listed under Active Leases.
- Power on the new Pressure Box (by ensuring the blue Ethernet cable is plugged into it) and wait a few seconds.
- Refresh the DHCP Server status page. A new device should appear under Active Leases with an automatically assigned IP address ending in .250–.254.
- Record the MAC address of this device. Note that unconfigured Pressure box units typically appear under the hostname ‘Wiznetxxxxxx’.
- Return to Section 4.1 and configure the DHCP server with the retrieved MAC address.
5. Testing the New Pressure Box
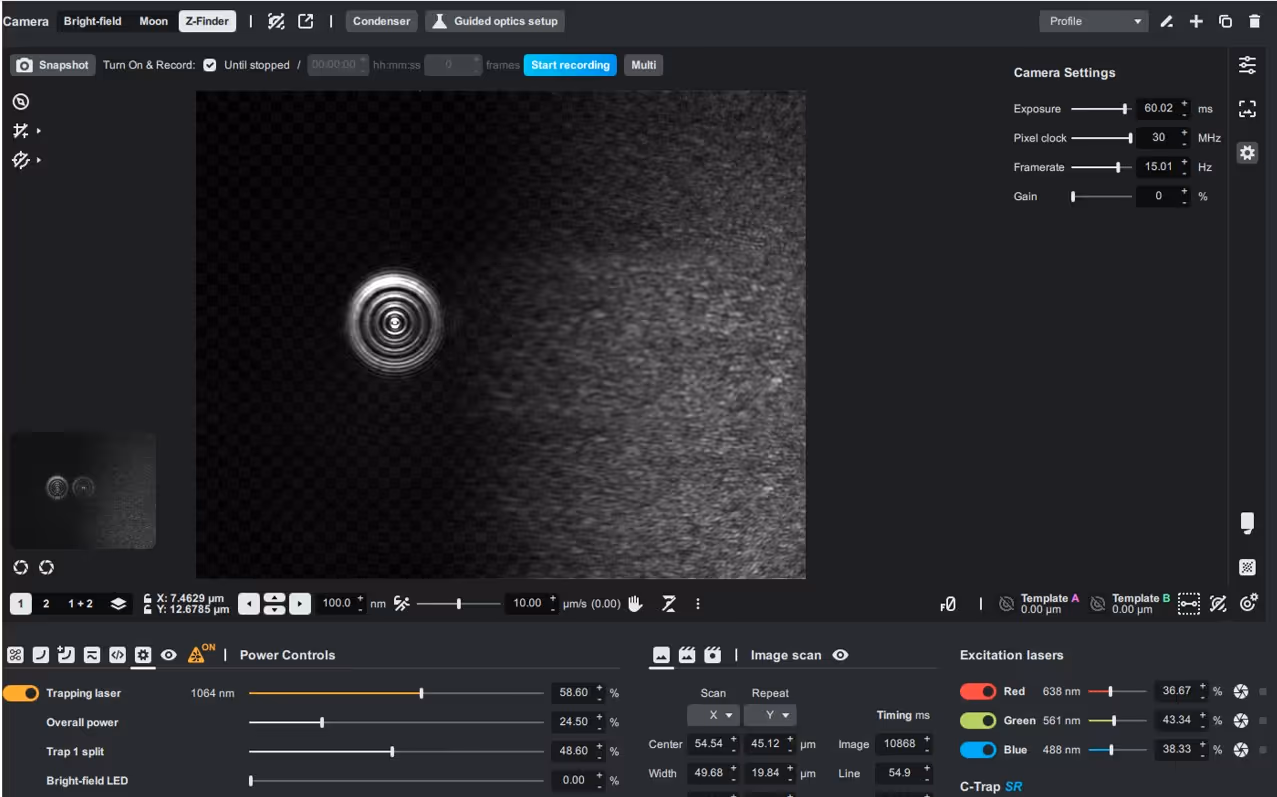
5.1. Open Bluelake and check the status messages in the pressure control panel:
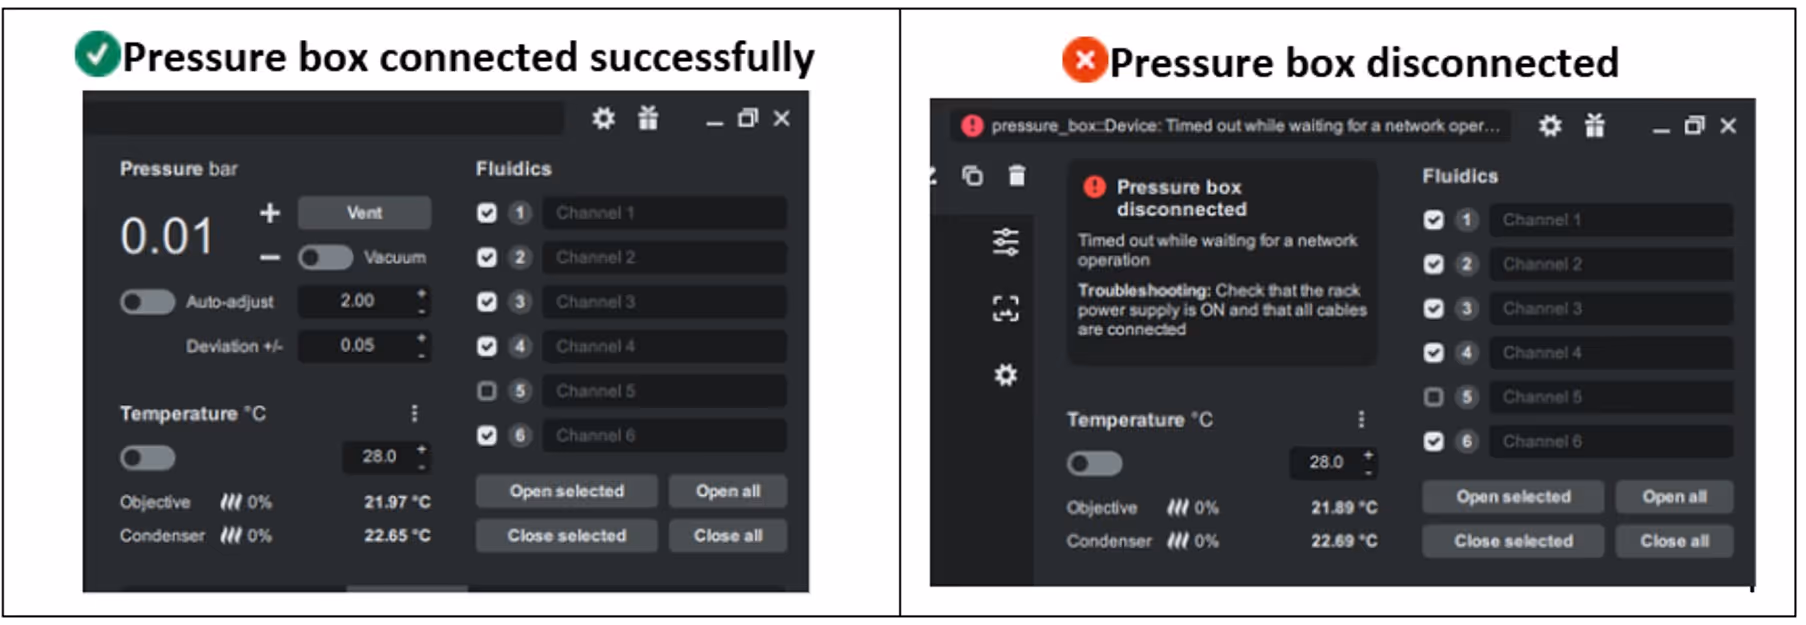
If disconnected: restart Open DHCP Server (Section 4.1, steps 4 and 5), wait 30 seconds, and restart Bluelake.
5.2. Verify pressure control functions in Bluelake:
- “+” increases pressure.
- “–” decreases pressure.
- Vent releases pressure.
- Vacuum sets pressure to 0 bar.
5.3. Set the pressure to 2.0 bar and deselect auto-adjust. Confirm that the pressure does not drop by more than 0.1 bar over 10 minutes.
6. Final Steps
6.1. Decontaminate the faulty unit following the decontamination instructions provided in the decontamination form in the package with the replacement unit.
6.2. Pack the faulty Pressure Box into the shipping box from the replacement unit.
6.3. Attach the return label provided with the shipment.
- If no return label is included, contact customer support via your support case.
6.4. If direct courier collection (typically FedEx) is not possible, provide the package tracking number to customer support, who will arrange collection.
7. Troubleshooting
If the following troubleshooting steps do not resolve the issue, contact customer support (support@lumicks.com) via your support case for the replacement. Clearly describe the problem you are experiencing.
7.1. No Connection in Bluelake
- Confirm that the Ethernet cable is securely connected between the Pressure Box, the C-Trap, and the rack (the Ethernet hub at the back of the rack should have two blue Ethernet cables properly connected).
- Check that the lights on the Ethernet connector of the Pressure Box are flashing.
- Verify that the MAC address written in the OpenDHCPServer.ini file matches the Pressure Box MAC address.
- Restart Open DHCP Server in the Windows Services panel, wait 30 seconds, and restart Bluelake.
7.2. No or Reduced Air Pressure
- Confirm that the black regulator shows 2.1 bar.
- If unable to reach >2 bar, check that the needle on the grey regulator is between the two green markers. Adjust if necessary.
- If pressure still cannot be increased, ensure the external compressed air supply to the system is set to 6 bar.
7.3. Pressure Not Stable
- Set the Pressure Box to 2.0 bar and deselect auto-adjust.
- Confirm that the pressure does not drop more than 0.1 bar over 10 minutes.
- If instability persists, contact support@lumicks.com and provide details of the pressure fluctuations.