Abstract
This guide details how to recover Trap 2 in the C-Trap system when it is out of view. It uses Z-finder camera focus, joystick movement, and step-size adjustments to locate and center the trap based on back reflections. The same guide can be used to find Traps 3 and 4.
If Trap 2 is lost from the field of view, follow the steps below to bring it back using the Z-Finder camera in Bluelake. You’ll be looking for the second back reflection to help you re-locate the trap.
Tip: If Trap 2 appears at any point, you can skip the remaining steps and reposition it directly.
1. Open the Z-Finder and Adjust the Objective
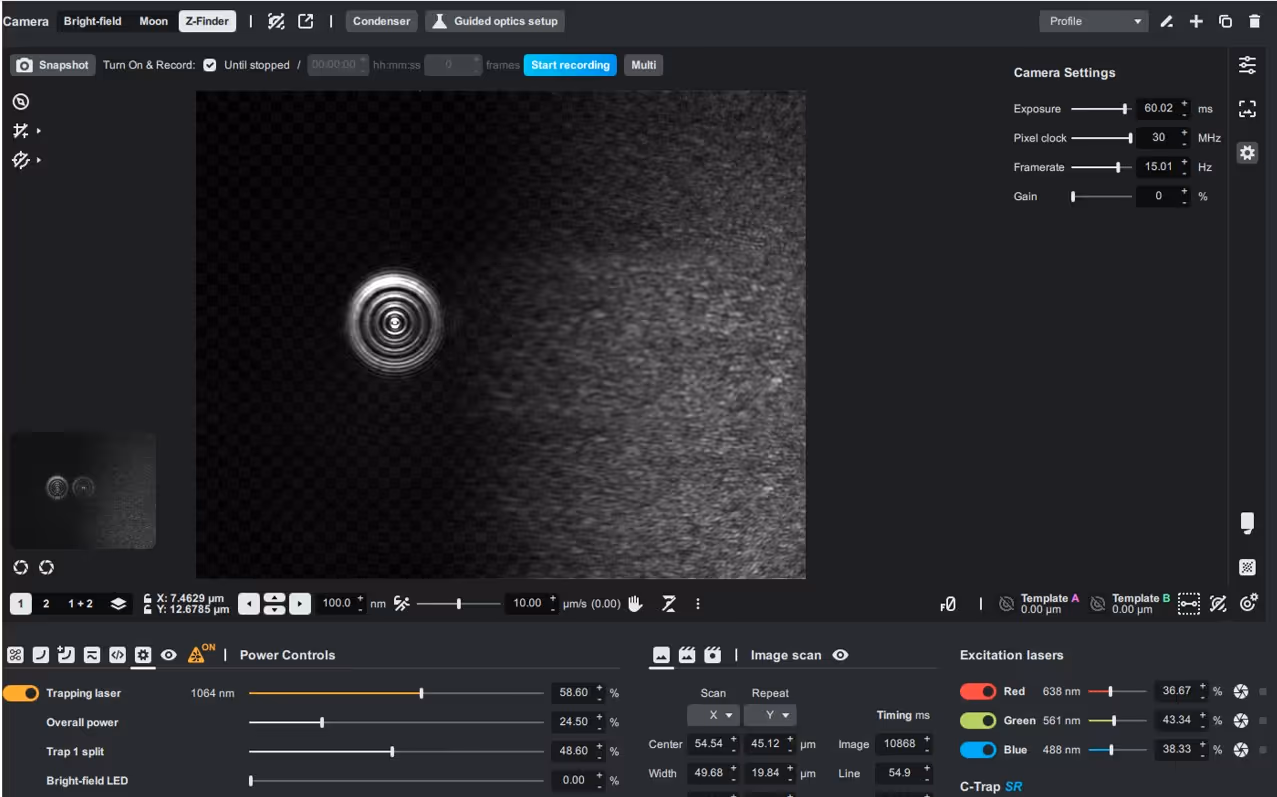
- Go to the Z-Finder camera tab in Bluelake.
- Using the objective micrometer, move the objective downward, toward the first back reflection, until the back reflection is clearly visible.
- Adjust the height until you can see wide interference rings, these make Trap 2 easier to spot.
2. Check Initial System Settings
- Confirm that the Trap 1 split is set to 50%.
- Make sure that Trap 1+2 XY position is centered at (0, 0).
3. Move Trap 2 to the Right Limit
- Select Trap 2.
- Use the joystick to move it all the way to the right.
- Stop when the clicking noise stops. This indicates the trap has reached its limit.
4. Move Trap 2 to the Left Limit with Large Step Size
- In the Trap movement box (red box), enter a larger step size, such as 5,000 nm (5 µm).
- While counting the clicks, click the left arrow to move Trap 2 all the way to the left limit. Try to stop a little after every click such that you notice if anything moves in the Field of View.
- Stop when the clicking noise ceases (you’ve reached the end). This will require many clicks.


5. Center Trap 2 in X
- Divide the total number of clicks it took to go from right to left by 2.
- Move that many steps back to the right, to position Trap 2 roughly at the center of its X-range.
- Lock the X-direction.
You might already see the second back reflection at this point. If so, skip ahead until step 9 to adjust the objective and center visually.
6. Move Trap 2 to the Upper Y Limit
- Use the joystick to move Trap 2 upward until the clicking stops.
7. Move Trap 2 to the Lower Y Limit
- Use the large step size from earlier.
- While counting clicks, click the down arrow until Trap 2 reaches the bottom (no more clicking).

8. Center Trap 2 in Y
- Divide the number of clicks by 2.
- Move that many steps back up, centering Trap 2 in the Y-direction.
9. Final Adjustments in the Z-Finder
- Trap 2 should now be close to its central position and visible in the Z-Finder.
- If the rings are not visible:
- Slightly raise the objective to widen the back reflections.
- Move Trap 2 around gently until you locate the reflection.